BCQuilter's Weblog

Archive for January 2009

I have finished my first lesson for the online course “To Bead or Not To Bead”, that I am taking at Quilt University.   During the four week course, we will be learning several beading techniques, and making a beading sampler.  We have the option of using a design created by the instructor, designing one ourselves, or using a grid format to display what we are learning.  I have opted to go with the grid format.  I don’t need another beading project, and to be honest, I wouldn’t know where I would hang the beading sampler.  I thought that having the sampler in a grid format, would be a good reference.

What do you need to start beading?

  • An idea or inspiration! – How do you know if your quilted project needs beading?   One of the easiest methods, I know… is to sprinkle some beads on it (of course it is best to have your quilt on a flat surface *grin*).    You can place some of the beads with your fingers to get different effects – even checking colours!
  • A quilt project – do consider how the item will be used.  Will it be washed?  Will it be exposed to sunlight?  (I’ll discuss this a little further on).
  • Some beads – oh my… the world of beads is phenomenal.  There are several online resources for beading… granted they are primarily for beading jewellery and such… but you can still use them for quilting.  It’s tough, pawing through the pages of the internet, looking at all those gorgeous beads… money for fabric, or money for beads?   I wonder if I’ll ever find a balance.
  • Thread – oh my… there is such a wide range of views and opinions on what is the best thread for beading on quilts.  For my beading experiment as well as my bargello, I used a Hand-quilting 100% cotton thread, that I ran through beeswax.   Didn’t know of anything else, as someone in the guild showed me this method.   Some threads do not hold up to bugle beads (they are not finished like the seed beads, so their ends are quite sharp – typically they are beaded with seed beads to protect the thread from abrasion).  Some threads tangle more.  Some threads are to thick and will not go through a bead more than once (this could be important for securing beads, as well as for some fancy work).   It is sometimes difficult to find the thread recommended in a class or a book.   I suppose if what I had used before, does not hold up, I’ll have some rebeading to do!  Use what you have, and if you thoroughly enjoy the beading, try others, and see what you like.
  • Needles – again, this comes to personal preference.   Some like the long beading needles (although they are quite thin, and do bend easily), some like to use applique needles.  What ever you use, be sure they will go through the bead.  Just because it goes through your first 20 beads, doesn’t necessarily mean it will go through all of them.  (I found that out).  Instead of putting the bead aside, I grabbed a thinner needle, threaded it, strung the bead on, changed needles and continued on.  Use what you have, and if you really like beading, experiment with others.
  • Containers – you will need somewhere to store your beads.  Personal preference here.  I think the easiest is keeping the beads in the containers they come in, but you could use small recloseable bags, sewing kit boxes, tic-tac containers (you can buy similar looking containers), etc.

beads

Now you are ready to bead!

Some things to take into consideration.  And I didn’t know this prior to my course (see… I learned a few things even in the first lesson!).  Not all beads are colourfast.  *gasp*.  Yes, its true.  Some will lose colour when washed.  It is recommended to put a pinch into a little dish of soapy water, swish them, and leave them.  Take them out and place them on white (waste) fabric (I suppose white paper would work too).  Has the water changed colour?  Has the fabric or paper have little colour deposits?  These beads will not be appropriate for any project that will be washed.  The colour from the beads, WILL transfer to your fabric.

Another test, is sunlight test.  Place a pinch of the beads in a window or area, that gets direct sunlight for a few days.   Using white fabric, compare the test beads to the originals.  Is their colour loss or change?   Do not use these beads if your beading project will be touched by sunlight.

Now for my class project.  Our first lesson included “Scatter beads”; Bugle and Seed Beeds; and Curves.  I really like the curves… you can make it look like a piece of ribbon floating.

alice_beading_lesson_1

I am looking forward to Friday evening, when the next lesson is posted.  I am now using an “invisible” monofilament thread for the course.  We do not have any source for beading supplies (except the discount/dollar stores and Wal-Mart), so I am making do with what I have.  I could order online.  There are only a couple of places in Canada, and shipping would be pricey, unless I’m ordering $100 or more (not quite ready to jump there yet), or I could order from the US and pay more shipping as well as custom.   My next trip out of town, I’ll be checking a few places and see if I can find supplies through them.  If not… then I’ll bite the bullet and order online… hmmm… I wonder how much $100 worth of beads is?

You know, I should really schedule some time to actually sit and write.  I have so much to write about… and I just don’t get it done.  And now I’ve kind of put myself on the hook, so I had better keep up.

What am I babbling about?  Well, it all started quite some time ago.  I was asked by the Program Comittee of our Quilters’ Guild to do a presentation on Computers and Quilting.  The place we meet does not have internet access, so I was working on a few things getting ready for the presentation.  One of the topics to be discussed was Online Courses.  It is amazing in less than one year, how many online courses are now available at different websites.  Some are free, some require a membership, and of course there are the paid ones.

While checking out Quilt University I saw that they had a Beading class beginning January 23.  I thought it over, even brought it up at the discussion.   I jumped in and signed up for it on the day it began.  So now I am a student at Quilt University.

Now for a little more history on my Adventures with beading.

At the top of my blog, you’ll notice a bargello.  This is my first Bargello.  When I displayed it to my guild (in the fall of 2007), one of the members suggested I bead it.  I was aghast… I had no idea how to bead.  I let it slide.     A workshop was offered by our guild in early 2008 on beading and embellishing.  I wasn’t ready to pursue that venue, so I didn’t sign up for it, but I did show up to take some photos of the group, and what they were doing.  The bug hadn’t bit me yet.  I was asked to come and visit during the Spring Retreat, and to take some photos.  I had a lovely day, and I look forward to when I can actually participate in an entire weekend retreat.  Well, one of the members (actually the one who suggested I bead the bargello), asked if I wanted to do some beading.  I quickly explained, I had no idea what to do, and she very promptly told me that didn’t matter… put the thread on the needle, poke it in the fabric, put on a bead, and put it back through the fabric.  Sounds easy enough?  Well, it was, and I felt I got very creative with her piece.  Don’t know if it was to her liking, but no matter, I had fun with it anyhow.  The bug hit me!

In September’ish 2008, the bug bit me even more.  I decided I was going to quilt a setting sun, and sun rays on the bargello.  My first attempt did not appeal to me… There wasn’t enough contrast between the beads I was using, and the fabric.   I mentioned this to another guild member, and she offered to give me some suggestions.  I was heading to her place to teach her a few things on her computer.  WOW!  What great ideas.    So I’ve been working a little at a time on the Bargello, to get it ready for our Quilt Show in March.

I had actually stopped working on the Bargello, as I felt that if I worked on a small piece, and do some practice it would better prepare me for the Bargello.   This did and din’t work.

I started “My Beading Experiment”.  My idea was to find a piece of fabric with a design, and then use the design as a guide to the beading.   I found a Fat Quarter of fabric.
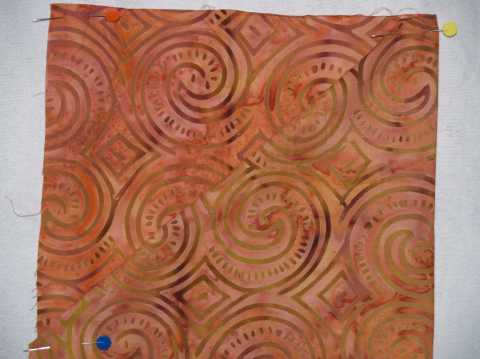
copper-batik-small

I cut it into quarters, added sashings and a border, sandwiched, and quilted in the ditch around the sashing and borders.

beading-experiment-small

My plan is each quarter will be a different colour scheme, and each will be beaded differently.  The first colour I used was green.  I’ve started in the photo above.

I have since finished the green, and am working in the opposite corner with blue.    I want this project to be a surprise to my Guild Members… so I won’t be publishing any more photos until it is completed, after the Quilt Show.

Which leads us to the Quilt University course.  We will be working on a sampler during the course, and another project or two.  I don’t know if I will ever apply beading to clothing (never say never, right?), but I will be definitely looking at projects a little differently.

Well, I should be off to prepare my fabric for the course.  I’ll be posting my progress here.  Thanks for stopping by!

-Alice

It seems like forever since I’ve blogged… even the “Adding New Post” page has changed since my last blog entry.  I was sitting here, thinking about the several projects I have in progress, and what I would like to put into our Guild’s Quilt Show, and I thought I should update my UFO list.   And its been August, since I’ve updated that list.  I think I may have a few things missing on it.  Wow… I have a few blogs I could write, just from looking over this list.  I think I need to get busy.  *grin*.   I received a tri-pod for Christmas, and I think I need to get it set-up to take some photos of projects I have finished… but have not posted… as well as for my own archives.  Hmmm… speaking of such… my Quilt Journal is in sad shape… haven’t kept up with that either.  Another to do list to write up!

In no particular order:

  1. West Coast Sunset: embellish
  2. Flutterbys: sandwich, quilt, bind, label, post pic
  3. My Interlocking Block Quilt: sandwich, quilt, bind, label, post pic
  4. Beading Experiment: bead, bind, label, post pic
  5. Curve Play quilt: piece 24/24 blocks completed, sandwich, quilt, bind, label, post pic
  6. Shauna’s Black & White & Green all over Guild Mystery Quilt 2008: piece, sandwich, quilt, bind, label, post pic
  7. Bargello #2: piece, sandwich, quilt, embellish, label, bind, post pic
  8. Bear’s Paw quilt (Oldest DD): 6/6 blocks completed, piece borders & sashing, sandwich, quilt, bind, label, post pic
  9. Mile-A-Minute Quilt: piece, quilt, bind, label, post pic
  10. Guild Challenge 2008: GET IT DONE!
  11. My very first quilt (when I was 9 years old): fix, size, sandwich, quilt, bind, label, post pic

Completed Quilts:

  • Community Charity Quilt: bind, post pic COMPLETED!
  • Mystery Quilt – Star Bright: piece backing, sandwich, quilt, bind, label, post pic COMPLETED!
  • There’s a Dog on My Quilt: sandwich, quilt, bind, label, post pic COMPLETED
  • Stained Glass Rose Wall-hanging: sandwich, quilt, bind, label, post pic COMPLETED!
  • Sunflower place-mats: COMPLETED!
  • Gotta Luv Cats: (Mom’s Red-work Cat Quilt) cut, piece, red-work 12/12, sandwich, quilt, bind, label, post pic COMPLETED!
  • Table Runner: COMPLETED!
  • Sailboats and Lighthouses #1 and #2 – COMPLETED
  • Sunrise over Bayne’s Sound (Fabric Collage): sandwich, quilt, bind, label, COMPLETED!

EDIT: The Mystery Quilt is completed!!!! – 12 Feb 2008
EDIT: There’s a Dog on My Quilt – 21 Feb 2008
EDIT: Rose where did you get that red (Stained Glass Rose Wall-hanging) – 12 Mar 20008
EDIT: Gone Fishing – 30 July 2008
EDIT: Summer Porch Comfort – 08 August 08


Enter your email address to subscribe to this blog and receive notifications of new posts by email.

Join 109 other subscribers

Calendar

January 2009
S M T W T F S
 123
45678910
11121314151617
18192021222324
25262728293031